Why Does Uneven Ground Matter for a 100-Gallon Stock Tank?
The Rubbermaid 100-Gallon Stock Tank, a heavy-duty polyethylene basin weighing roughly 25 lbs empty and holding nearly 830 lbs of water when filled, demands a level foundation. On uneven terrain, you risk structural stress on the seams, uneven water distribution that strains the tank’s walls, and premature wear on any installed heaters or aerators. For most pastures, a slope of more than 2 inches over the tank’s 62-inch diameter can lead to water pooling on one side, increasing the likelihood of cracking in freezing temperatures or misalignment of accessories like the freeze sensor.
Proper setup starts with site evaluation. Measure the longest axis of the tank (typically 62 inches) and use a 4-foot carpenter’s level in multiple spots. If you detect even a half-inch dip, the tank’s rubber feet (molded into the base) won’t seat evenly, causing the sidewalls to flex. Over months, this flexing can create micro-cracks, especially if you’re using a heater that cycles on and off. The goal is a flat, compacted area that supports the full footprint—leveling is non-negotiable for longevity.
How Do I Level the Ground Before Installation?
You’ll need a few tools: a long-handled shovel, a hand tamper or plate compactor, a 4-foot level, and a wheelbarrow of road base or crushed stone. Start by clearing a 70-inch diameter circle—remove sod, rocks, and roots to a depth of 3-4 inches. If the slope is under 3 inches, use a rake to redistribute soil from the high side to the low side. Tamp the entire area until the surface is firm; a plate compactor (rentable for about £40/day) ensures uniform density.
For slopes exceeding 3 inches, build a raised pad: excavate the high side to match the low side, lay a 2-inch layer of 3/4-inch crushed stone, and compact. Check with the level in both directions—north-south and east-west. The pad should be level within 1/8 inch across the tank’s base. If you’re placing the tank near a barn foundation, ensure runoff from roofs won’t erode the pad. For off-grid installations, consider adding a 4×4 pressure-treated timber frame (screwed together) to create a box low enough to bury the tank rim flush with the ground, but only if the ground is already level.
What’s the Best Base Material for Stability?
Two common materials dominate: compacted gravel and concrete pads. Each has trade-offs, as shown in the table below:
| Base Material | Cost (USD) | Installation Time | Durability | Best For |
|---|---|---|---|---|
| Compacted Gravel (3/4-inch crushed) | £25-£40 per cubic yard | 1-2 hours (hand tamping) | Good, settles over 1-2 years | Moderate slope (under 2 inches); temporary setup |
| Concrete Pad (4-inch thick, 6×6 ft) | £80-£150 (DIY mix bags) | 2-3 hours (pouring, 24h cure) | Excellent, no settling | Permanent location; heavy clay or sandy soil |
| Pressure-treated Wood Frame with Gravel Fill | £30-£50 | 2 hours (assembly & fill) | Good, wood rots in 5-7 years | Quick fix; elevated tanks for drainage |
| Rubber Mat (3/4-inch thick, 5×5 ft) | £20 each | 30 minutes | Fair, mats shift in heavy rain | Flat, hard ground only |
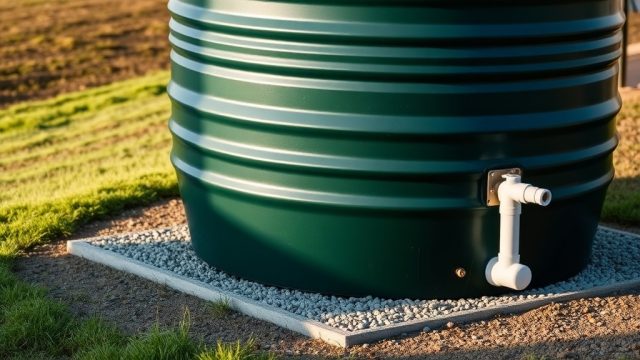
For most farms, compacted gravel offers the best balance of cost and stability. Spread a 4-inch layer, water it slightly, and tamp until a boot leaves no imprint. Avoid sand—it shifts under the tank’s weight, especially when full. If you have rocky soil, consider a concrete pad to prevent rocks from puncturing the tank’s bottom. The Rubbermaid 100-gallon tank’s bottom has a reinforced ribbed pattern, but sharp stones under 1 inch can still indent it over time.
How Do I Adjust for a Sloped Pasture Without Excavation?
If digging is impossible (e.g., near tree roots or utility lines), use shims or adjust the tank’s feet individually. The Rubbermaid tank has four molded feet at the corners. Buy heavy-duty rubber shims (often used for leveling washing machines, about £5 for a pack of four) and place them under the low-side feet. Measure the difference—for a 1-inch slope over 62 inches, you’ll need a 1-inch shim under one foot and a 1/2-inch shim under two adjacent feet. This method works, but it creates pressure points on the tank’s base; check every month for cracks.
Another approach: bury the tank slightly. Dig a shallow depression (up to 4 inches deep) on the high side to sink the tank rim below grade, then backfill around the low side. Ensure drainage channels lead away from the tank to avoid mud. For tanks with a solar-powered aerator, maintaining a level float switch is critical—an unlevel tank can cause the aerator pump to run dry, damaging the motor. Test the water level: after filling, use a level across the rim to confirm water surface is parallel to the rim. If not, adjust shims or the depression depth.
What Accessories Need Special Consideration on Uneven Ground?
Accessories like heaters, de-icers, and filtration systems rely on even water level for proper operation. A float valve (for automatic fill) will malfunction if the tank is tilted, causing overflow or insufficient water. Set the float arm level with the rim using a level—adjust the bracket if needed. For winter use, a 1,500-watt electric heater may tilt inside the tank, touching the sidewall and creating a fire hazard; always mount heaters on a bracket that attaches to the tank rim (most kits include adjustable arms). On a sloped installation, check that the heater’s thermostat is submerged at least 6 inches—if the tank is lower on one side, the water level on the high side might leave the sensor exposed.
For aeration, the solar aerator requires the diffuser to rest flat on the tank bottom for even oxygen distribution. Use a weighted base or suction cups to secure it; on unlevel ground, the diffuser may slide downhill. Similarly, biological filters for algae control rely on even flow—if the tank tilts, the pump intake may sit above the water line, causing cavitation. Check pump orientation monthly: the output hose should loop over the rim without kinks, and the pump body should be submerged fully.
What Owners Say About Installing on Uneven Ground
“I set our Rubbermaid 100-gallon tank on a gravel pad that I leveled with a hand tamper—took about an hour. The tank has been there for two winters without a crack. The key was bringing the gravel up to the same level across the whole pad,” says Mark T., a sheep farmer in Herefordshire. “I made the mistake of using sand first—it washed away in a heavy rain—so I switched to crushed limestone. The tank hasn’t shifted since.”
Another owner, Sarah L. from Nebraska, shares: “We had a 4-inch slope on our paddock. I didn’t want to excavate because of buried irrigation lines. I used 2-inch-thick rubber stall mats under the low side—they cost about £30 each. The tank sits level now, and the mats also insulate the bottom from frost. But I had to drill the mats to match the tank’s feet to prevent sliding.”
“I buried my tank halfway into a slope on a hillside,” writes Jake R., a goat breeder. “I dug a shallow basin on the uphill side, so the rim is just above grade. The downhill side has a small retaining wall of fieldstones. It works perfectly, but I had to reroute the water supply line under the tank to avoid freezing. The biological filter I added later works fine because the pump sits deep enough.”
Frequently Asked Questions
1. Do I need a permit for installing a large stock tank on uneven ground?
In most rural areas, no permit is required for a stock tank. However, if you pour a concrete pad over 4 inches deep or alter drainage patterns near a property boundary, check local regulations. Contact your parish council or county office for specifics—especially if the tank connects to a well or municipal water supply.
2. Can I use a plastic leveling kit made for above-ground pools?
Yes, but only if the kit uses heavy-duty shims (at least 1/2-inch thick) designed for 1,000+ lbs. Pool leveling blocks (often expanded polystyrene) compress under 830 lbs of water, so choose rubber or hard plastic shims. Avoid foam boards—they degrade in UV light within a year.
3. How often should I check the level of the tank after installation?
Monthly during the first year, then every 3-6 months. Freeze-thaw cycles can heave soil, shifting the tank. After a heavy rain, inspect for water pooling under the tank—if it does, you need to improve drainage. Annual re-leveling with a hand tamper is common if you use gravel base.
4. Does the Rubbermaid 100-gallon tank warranty cover cracks from uneven ground?
Rubbermaid’s limited warranty typically excludes damage from improper installation, including unlevel surfaces. The tank is designed for level ground; voids due to sloped bases are your responsibility. Check the product booklet or contact customer support for exact terms—warranties vary by region.
5. What’s the best way to attach the tank to a sloped concrete pad?
Drill 1/4-inch holes through the tank’s base flange (avoiding the ribbed area) and use concrete anchors with nylon washers. Space anchors every 18 inches around the perimeter. For a pad that’s level but the tank feels unstable, silicone caulk under the rubber feet to grip the concrete—skip long screws that might crack the tank bottom.
6. Can I adjust the tank after it’s full?
Yes, but you risk tipping if you try to lift the full tank. Draining the tank completely takes about 10 minutes with a 1-inch hose from the drain plug. Once empty, adjust shims or excavate/backfill as needed. Never use a crowbar under a full tank—it can stress the seam. For small adjustments (under 1/2 inch), use a car jack with a wide wooden block under the low side while the tank is half-full.