Common Causes of Cracks in a Tuff Stuff 200-Gallon Stock Tank
Cracks in a Tuff Stuff 200-gallon stock tank can be frustrating, but they are often preventable and repairable. These robust tanks are built to last, yet harsh weather, heavy livestock pressure, or improper installation can lead to fractures. Understanding the root causes is the first step in fixing and avoiding future damage.
Most cracks stem from freeze-thaw cycles that cause water to expand and contract within the tank walls. While the tank’s high-density polyethylene (HDPE) material is durable, repeated stress from ice formation can create hairline fractures. Other common culprits include impacts from horns or hooves, improper leveling that puts uneven pressure on the base, or using the tank for non-stock purposes like tool storage. Always inspect your tank seasonally and after extreme weather events.
How Do I Assess the Severity of a Crack Before Repairing?
Before reaching for a repair kit, you need to gauge the crack’s depth and position. A superficial scratch may only need sanding, while a penetrating fissure requires immediate patching. Use a flashlight to inspect both the interior and exterior surfaces of the tank. Look for signs of water seepage, such as damp patches or algae buildup along the crack line.
To help you decide the best approach, refer to the table below for severity classifications and recommended actions.
| Severity Level | Appearance | Water Loss (per hour) | Repair Method | Estimated Cost |
|---|---|---|---|---|
| Cosmetic | Surface scratch, no depth | None | Sanding with 120-grit sandpaper | $0 (free if you have sandpaper) |
| Hairline Fissure | Thin line, less than 1/16 inch wide | Trickle (less than 1 cup) | Plastic weld filler or epoxy stick | $8–$15 |
| Structural Crack | Wider than 1/8 inch, jagged edges | Steady stream (1–3 gallons) | Patch kit with mesh reinforcement | $25–$45 |
| Full-Through Break | Visible hole with displaced plastic | Gushing (over 5 gallons) | Cut out section, replace with HDPE sheet | $50–$80 |
If the crack is on a bottom seam or near the drain fitting, the repair becomes more complex. For minor leaks, you can often fix them in place without draining the entire tank, but for structural cracks, fully empty the tank and allow it to dry for 24 hours.
What Materials and Tools Do I Need for a DIY Plastic Weld Repair?
For most Tuff Stuff 200-gallon stock tanks, a plastic welding kit is the preferred solution. Unlike simple epoxy, plastic welding melts the HDPE material back together, creating a bond almost as strong as the original. Start by purchasing a HDPE plastic welder (available at farm supply stores for $40–$70) and a pack of HDPE welding rods (about $10 for a pack of ten).
You will also need: a heat gun or propane torch with a fine tip, a stainless steel scraper for cleaning, isopropyl alcohol for degreasing, and clamps or weights to hold the area flat. If you prefer a cold repair, a two-part marine-grade epoxy rated for HDPE can work, but it is less durable under livestock pressure. For a step-by-step visual guide on preparing your tank before repairs, check our Tuff Stuff 200-Gallon Stock Tank Heavy-Duty Features: What Makes It Durable article, which details the material strength you are stitching back together.
How to Perform a Plastic Weld on Hairline Cracks
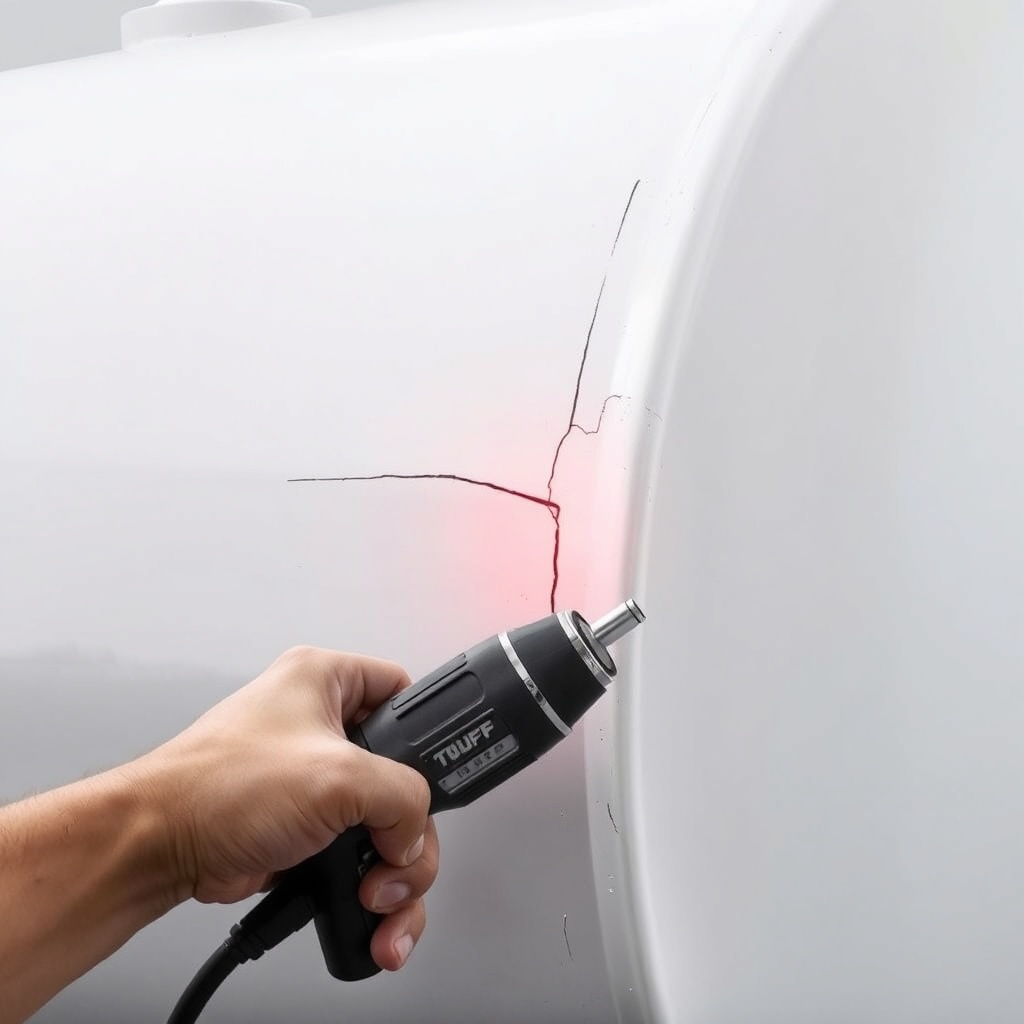
Hairline cracks are the easiest to repair and often take less than an hour. Follow these steps precisely for a watertight seal.
- Step 1: Drain and Clean. Empty the tank completely. Use a stiff brush and isopropyl alcohol to clean a 2-inch area around the crack. Let it dry for 15 minutes.
- Step 2: Roughen the Surface. Scuff the crack line and surrounding area with 80-grit sandpaper. This helps the melted plastic adhere. Wipe away dust with a clean cloth.
- Step 3: Preheat the Area. Using your heat gun set to 350°F (176°C), warm the plastic around the crack for 10–15 seconds. Do not melt the base plastic; just soften it.
- Step 4: Weld the Crack. Insert the HDPE welding rod into the welder tool. Begin at the bottom of the crack and move upward, pressing the rod into the fissure. Maintain steady pressure and a 45-degree angle. The rod should melt and fuse with the tank material. Continue until the crack is completely filled, overlapping by 1/4 inch at the end.
- Step 5: Smooth and Cool. Use the flat side of the scraper to flatten the weld while still hot. Let it cool naturally for 30 minutes. Do not splash water to cool it.
- Step 6: Test for Leaks. Refill the tank with a few inches of water and check for bubbles or seepage. If dry, you can refill to full capacity.
For tanks with complex cracks near the valve area, refer to our Tuff Stuff 200-Gallon Stock Tank Siphon Drain Setup: Effortless Water Changes guide, which explains how to safely disconnect plumbing before welding.
Can I Fix a Large Structural Crack Without Replacing the Tank?
Yes, but it requires more effort and a patch kit. For large cracks—those wider than 1/8 inch or spreading across a seam—a simple weld may not suffice due to stress concentration. Instead, use a fiberglass-reinforced HDPE patch kit (around $30) designed for polyethylene.
Begin by drilling a small hole at each end of the crack to stop it from spreading further. This is called “stop-drilling.” Then, cut a patch of HDPE sheet or fiberglass mesh at least 2 inches larger than the crack on all sides. Clean the area thoroughly, apply a generous layer of plastic epoxy to both the crack and the patch, and press the patch firmly. Use clamps or heavy weights to hold it for 24 hours. After curing, sand the edges smooth and ensure the patch is flush with the tank surface. This method restores about 80% of the original tensile strength, making it suitable for non-pressure areas like sidewalls. Avoid patching the bottom load-bearing section—if the base is cracked, consider replacing the entire tank for safety. Our Tuff Stuff 200-Gallon Stock Tank Buying Guide: What to Consider Before Purchase offers tips on choosing a new unit if repairs are not viable.
What Typical Repairs Cost and When Should I Replace Instead?
Repairing a Tuff Stuff 200-gallon stock tank is almost always cheaper than buying a new one, which costs around $180 to $250 new at farm supply retailers. A DIY plastic weld or epoxy kit runs between $8 and $45, depending on severity. If you hire a farm equipment repair service, expect to pay $75 to $150 for labor plus materials. For reference, the tank itself has a lifespan of 10–15 years with proper care, so a repair costing less than $50 is usually worthwhile for tanks under 10 years old.
However, replacement becomes practical if the tank has multiple cracks, severe UV degradation (brittle or chalky texture), or a split along the bottom seam. Also, if you notice persistent algae problems or water quality issues from aging plastic, it may be time to upgrade. For guidance on maintaining water quality after repairs, read Tuff Stuff 200-Gallon Stock Tank Water Quality Testing: How to Ensure Safe Drinking Water for Livestock to prevent contaminants from entering fresh water.
What Owners Say About Repairing Their Tuff Stuff Tanks
Livestock owners who have repaired their Tuff Stuff 200-gallon tanks report high satisfaction with plastic welding methods. Sarah, a cattle farmer in Nebraska, shared: “My bull cracked the side with his horn during a fight. I used a HDPE welder kit, and the repair has held for two seasons now. You can barely see it.” Others highlight the importance of drying time. “I rushed the epoxy repair on a hairline crack and had to do it again,” noted Tom, a dairy operator from Wisconsin. “Letting it cure fully for 48 hours made all the difference.”
A common theme among reviews is the tank’s inherent durability. Many owners note that cracks often result from preventable issues like ice pressure or overfilling rather than material defects. One user commented on a farming forum: “After 8 years, my Tuff Stuff tank developed a small crack near the drain. I patched it with a kit from the farm store for $12. Still going strong after two winters.” Negative feedback is rare but focuses on the learning curve of plastic welding. “First time I tried, I melted a hole bigger than the crack,” wrote a sheep farmer. “Practice on scrap plastic first.” For those considering buying a tank with repairability in mind, check Tuff Stuff 200-Gallon Stock Tank Size Comparison: How It Measures Up to Smaller Models to see how larger dimensions affect repair complexity.
Frequently Asked Questions
Q: Can I use a rubber patch on my Tuff Stuff stock tank?
A: Rubber patches (like tire patches) are not recommended for HDPE tanks. They lack adhesion to polyethylene and will peel off within weeks. Stick to HDPE welding or epoxy designed for plastic.
Q: Will repairing a crack affect the tank’s warranty?
A: The standard warranty on Tuff Stuff tanks covers manufacturer defects. DIY repairs usually void the warranty if performed incorrectly. Check your purchase documentation or contact the retailer before proceeding. Minor cosmetic sanding is generally safe.
Q: How long does a plastic weld repair last?
A: A properly executed HDPE weld can last 3–5 years or more, provided the tank is not subjected to extreme impacts or freeze damage. Epoxy repairs typically last 1–2 years.
Q: Can I repair a crack without draining the tank?
A: No, draining is mandatory for any crack repair. Water prevents the plastic from reaching proper welding temperature and contaminates epoxy. Empty the tank and let it dry completely.
Q: What if the crack is on the bottom of the tank?
A: Bottom cracks are more serious due to constant pressure. Small hairline cracks can be patched, but large bottom cracks often require tank replacement. If the base is compromised, consider reinforcement or a new unit.
Q: Can I prevent cracks from forming in the first place?
A: Yes. Use a tank heater in winter to stop ice expansion. Ensure the tank sits on a level, cushioned base like sand or rubber matting. Avoid overfilling, and inspect regularly for early signs of stress. For heater installation tips, see our Tuff Stuff 200-Gallon Stock Tank Winterizing: Heater Installation Guide.